Today I have a review of the new Kiss Gel Dress Nail Stickers. They are nails stickers that you can put a gel top coat over (and put in the LED lamp) and it's supposed to last up to 2 weeks. You're then supposed to be able to peel them off your nails.
Showing posts with label Gradient. Show all posts
Friday, January 24, 2014
Friday, February 24, 2012
Reverse Gradient Nails
I love new nail trends and when I saw this mani for the second time I knew I had to try it out. I first saw the design on a lovely nailboader and then again last night on the T.I & Tiny show. Tiny sported a dark pink mani with a white glitter gradient which was absolutely gorgeous.

I wanted to turn things up a notch so I tried it out over a darker base. The polishes I used were Nubar White Polka Dot and China Glaze Smoke & Ashes.
Excuse the awkward angles of the photos. I had to shoot my right hand because my left hand is under construction right now. Too many nail wraps at the moment :)

These are fun and super easy to do. I love the effect but I'll have to keep practicing to perfect the gradient.
If you know the nailboarder who first performed this design, please let me know so that I can give her credit for her work.
I'm also hosting a Spring Nail Art Contest. I would love to award you with some cool prizes. Click here to enter!
Thanks for stopping by! Have a happy polishing day ;D
Wednesday, December 28, 2011
Holiday Manis
Hope you're enjoying the Holidays! I had a great Christmas but now all I want to do is sleep and eat chocolate chip cookies. Part of me wants to get up and get moving but the other part wants to sit back, relax and enjoy the break :D
My current nail of the day is a foil stamp using the Red Angel plate RA-107. I really like the flower petal image so I tried it again with the Color Club Foil Collection over Wet N' Wild Black Creme. The outcome was a very dramatic but I like it!

The colors I choose were Cold Metal (blue), Perfect Molten (green), Hot Like Lava (pink) and Sally Hansen Silver Sweep. To create this look I randomly placed dots of each polish over the image then swiped. The colors will combine to create a swirled appearance. The silver is very dominant so you only need a smidgen.

And my simple Christmas mani. I used 1 coat of Wet N' Wild Hallucinate and sponged Milani Melt In The Sun over it. The nail decal is by Born Pretty.

My current nail of the day is a foil stamp using the Red Angel plate RA-107. I really like the flower petal image so I tried it again with the Color Club Foil Collection over Wet N' Wild Black Creme. The outcome was a very dramatic but I like it!
The colors I choose were Cold Metal (blue), Perfect Molten (green), Hot Like Lava (pink) and Sally Hansen Silver Sweep. To create this look I randomly placed dots of each polish over the image then swiped. The colors will combine to create a swirled appearance. The silver is very dominant so you only need a smidgen.
And my simple Christmas mani. I used 1 coat of Wet N' Wild Hallucinate and sponged Milani Melt In The Sun over it. The nail decal is by Born Pretty.
And those are my Holiday manis. Until next time, Happy Polishing!
Friday, September 17, 2010
Purple Gradient Mani
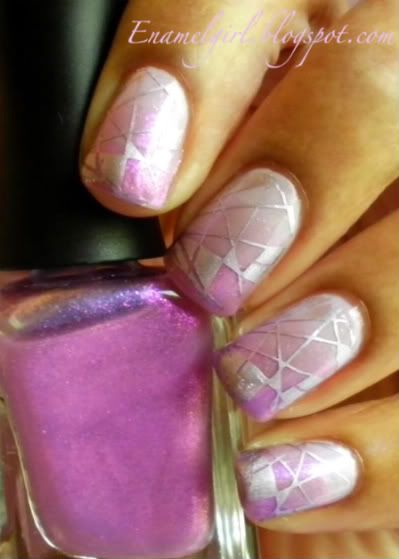
Happy Friday!!!! Here's my current NOTD. I've been super busy with school and unfortunately 3 exams are scheduled for next week. Soooooo, I probably won't post until next weekend. See ya then!
Products used:
-Essence Hang Loose (base)
-Savvy Purple Potion (sponge)
-Finger Paints Silver Sculpture (stamped)
-Konad image plate M64
Products used:
-Essence Hang Loose (base)
-Savvy Purple Potion (sponge)
-Finger Paints Silver Sculpture (stamped)
-Konad image plate M64
Monday, July 12, 2010
Leopard Foil Gradient Mani
This foil is called Wrapping Paper. I had to complete it twice because I forgot to apply a base color. It still wasn't completely opaque after applying a base, so I re-foiled the 1st two fingers. Can you tell the difference? If you look closely you can see the ridges on my pinky and ring fingers.
Well I hope this brightened your day, at least a little........... Until I polish again :)
Wednesday, May 26, 2010
China Glaze Neon Sun Rays
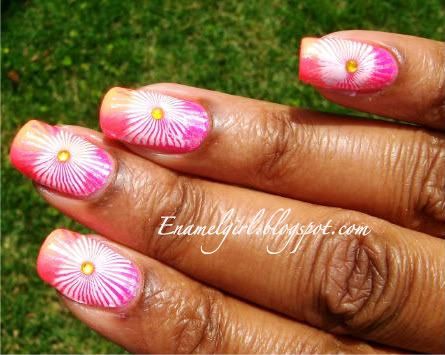
Here's a quick mani I did using China Glaze neons. It was originally supposed to be a neon gradient mani but I failed at that so I stamped sun rays on top of it. I used Chez Delaney plate number H5 and CG Flip Flop Fantasy and CG Pink Voltage. I love those name, lol. For stamping I used Konad white & LA Colors LIVE.
Subscribe to:
Posts (Atom)